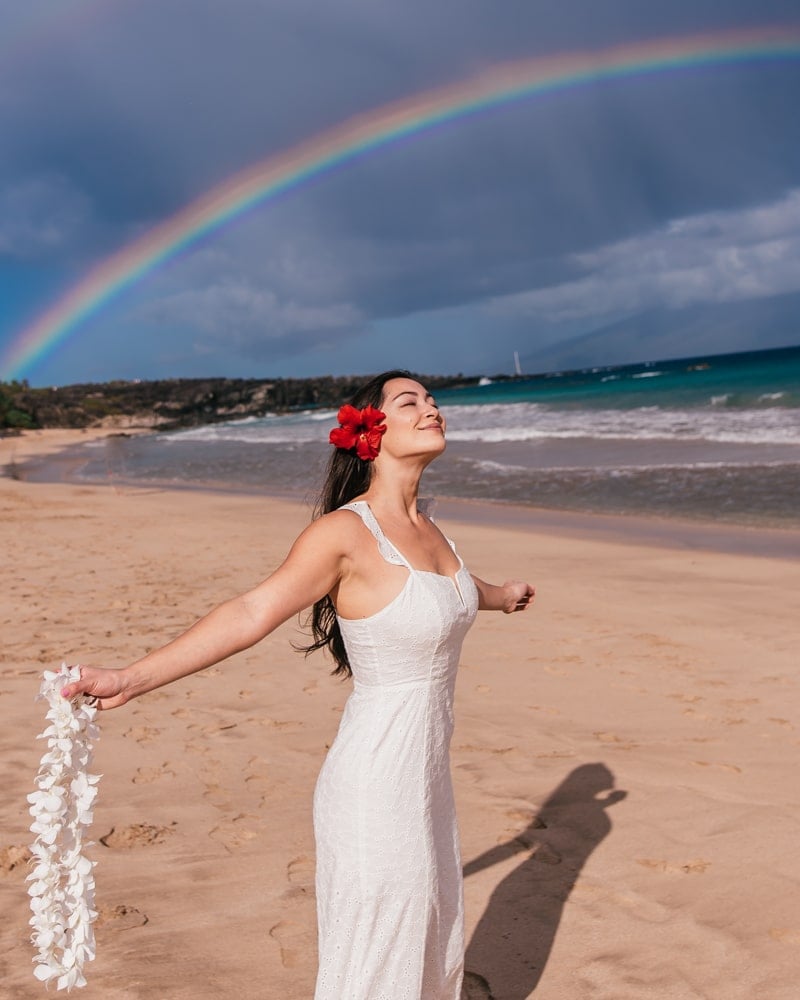
Harrison here (Jasmine’s husband and the guy in the photo above), and if you want to learn how to start a blog, this post is for you!
I’m talking specifically about the logistics behind creating your own website, step-by-step.
Although the context of this post is our successful travel blog (we make $11,000+ per month from this blog as you can see here), please note that this information applies to starting any blog, regardless of the niche!
So you can use this guide to start a fashion, fitness, home décor, photography, or any other blog type you can think of!
In fact, I’ve used the principles in this guide to start blogs about literature and about guitar.
Also, you may not have heard from me much or seen me often on social- that’s because I prefer to work behind the scenes!
I typically work on SEO and other technical and financial aspects of Jasmine’s and my businesses.
But I’m excited to share more about blogging since I have left my day job to work on our blogs full-time as of mid-2021.
Now let’s get down to how to start a blog.
Know to Use WordPress.org
If you’re not a technical person or are unfamiliar with blogging, don’t sweat it!
I’ve written this post for total beginners.
For beginners, experts, and really anyone who wants to start a blog, I recommend using WordPress.
What’s WordPress?
WordPress is a content management system (or CMS for short) that allows non-technical folks to add and publish content to their websites without writing any code or needing any technical skills.
It is the single most popular content management system, powering over 30% of all websites!
WordPress is also free to use and open-source (meaning anyone can contribute to its code).
It’s so versatile and easy to use that big companies like the Huffington Post and the New Yorker use WordPress for their sites as well as small businesses like ours.
In fact, of all the successful bloggers I know of, they all use WordPress!
WordPress.com vs WordPress.org
In the early days of WordPress (and blogging), there was just one way to use WordPress on a website.
Most people refer to that original way of using WordPress as wordpress.org (the CMS’s original URL).
Today, there is another way to use WordPress on a site and that is through wordpress.com.
You can set up a website with just a few clicks of a button on wordpress.com.
This new way to set up a website is more like the process you would go through to set up a website on Squarespace or Wix.
However, I do NOT recommend using wordpress.com.
Instead, I absolutely recommend using wordpress.org.
Wordpress.org is just slightly more complex to set up.
But if you want to know how to start a travel blog and make money, setting up a wordpress.org website is absolutely key.
Why?
Wordpress.org sites are totally flexible meaning you can make your site as simple or complex as you’d like.
This flexibility also means that you can join ad networks like the one we use that pays us over $7,000 a month!
You CAN’T join a third-party ad network with a wordpress.com site.
And even if you could, I still wouldn’t recommend it because you have less control over it than a wordpress.org site.
Get Web Hosting
Now that you know what CMS to use for your site, the first step in actually setting up your site is to get web hosting.
If you’ve never heard of web hosting, it basically means that you pay a company to host (or store) your website on a server (or computer) that is powered on and connected to the internet 24/7, 365.
Web hosting makes your site available online as opposed to a file stored locally on your computer that would be unavailable to the rest of the world when you turn off your computer.
When Jasmine and I first started blogging we used Bluehost to host this website, and we still use it to host other things.
Because our traffic has increased and we have photos with large file sizes, we now use WP Engine to host jasminealley.com.
Its starter package of ~$30/month is more expensive than Bluehost’s starter package.
But WP Engine’s customer service is excellent and their hosting is optimized for WordPress websites.
Plus, if you use our link, you’ll receive three months of web hosting for free!
That said, if $30/month is outside of your price range, Bluehost is still a great option.
- It’s inexpensive,
- easy to use,
- and if you use our link to buy it (here!) you can get 50+% off!
(Disclosure: both the Bluehost and WP Engine links are affiliate links, which means we receive compensation if you make a purchase using either of these links- but we wouldn’t advertise them if we didn’t use them ourselves!!)
They are both excellent web hosts!
Plus, my links get you a significant discount.
Setting Up Web Hosting and WordPress, Step-By-Step
If you click my Bluehost link, it will take you to a screen that looks something like this.
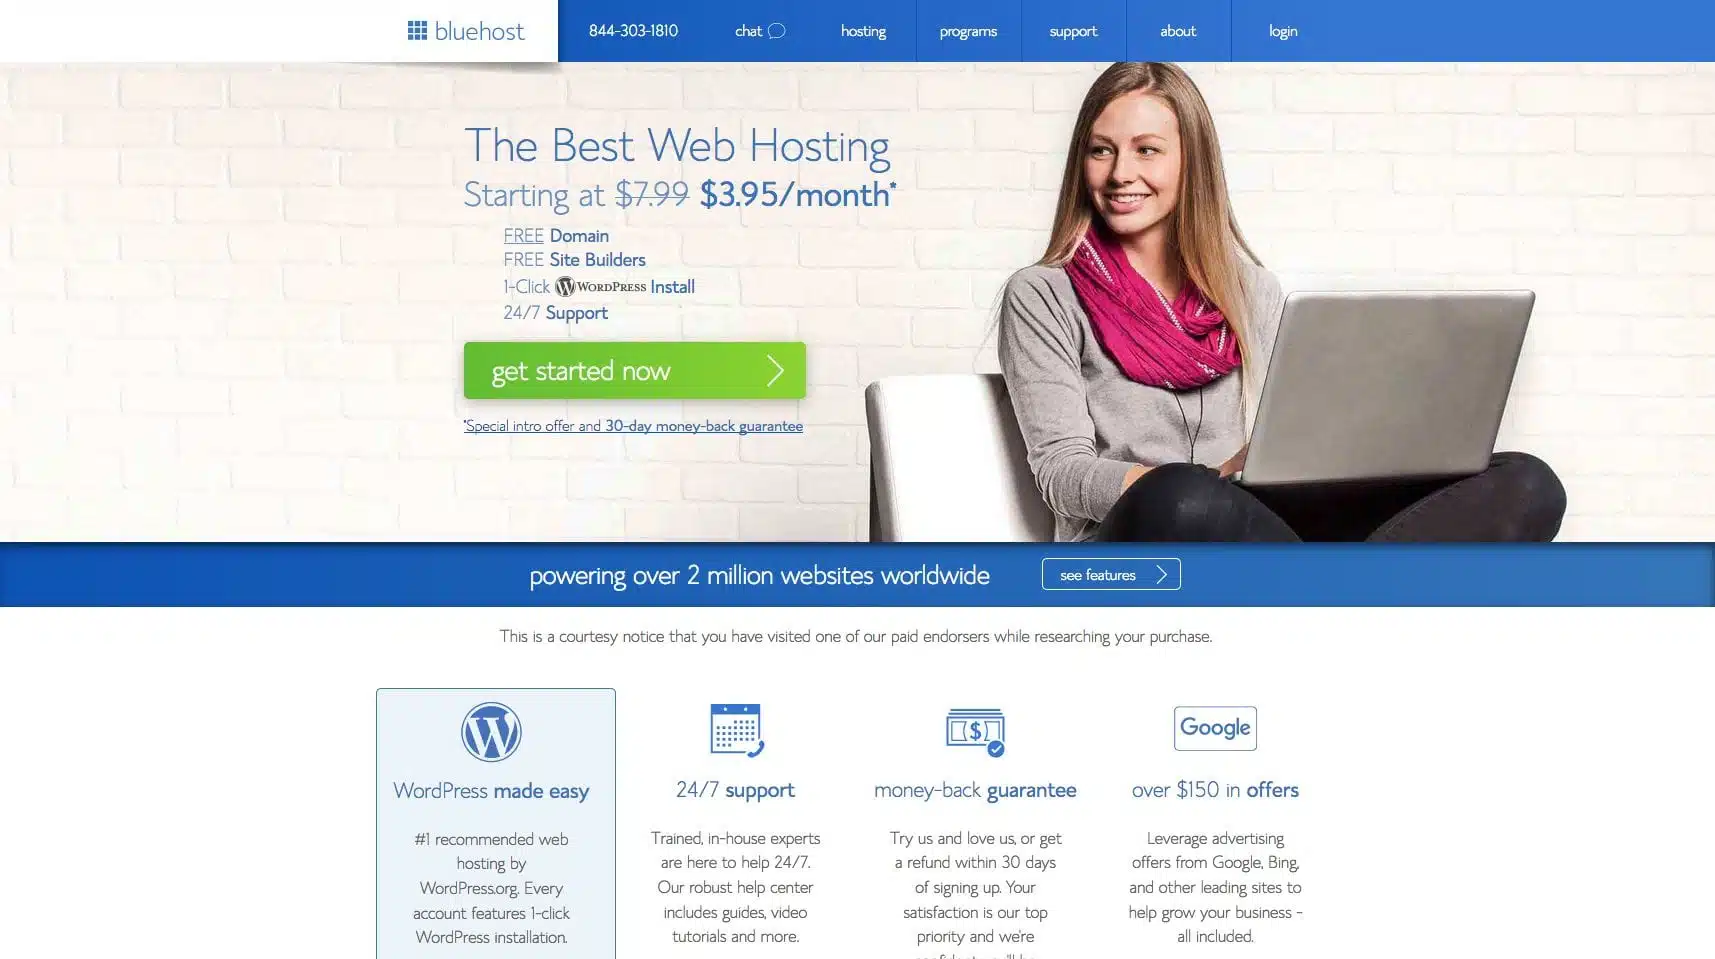
- Please note that Bluehost is always tweaking and updating their site so the following screenshots likely won’t look exactly like what you see.
- Click “Get Started Now”
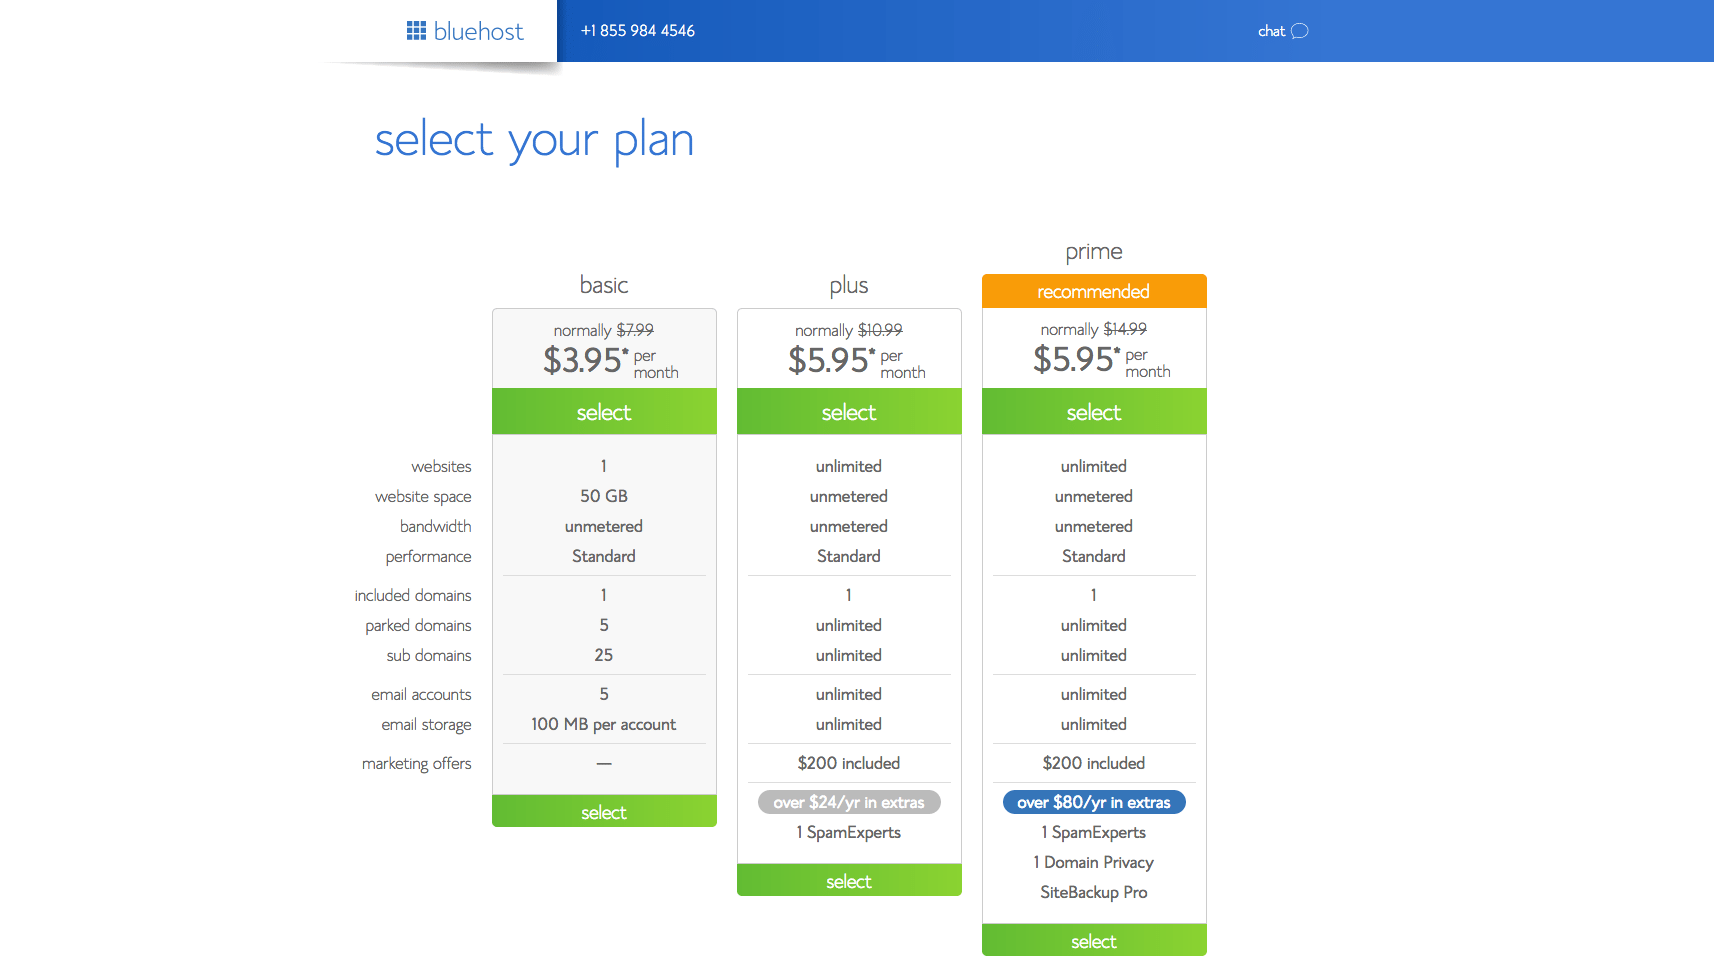
- Then choose whichever plan you’d like (the basic plan is just fine to start with).
Get your domain (website URL)
You can get your domain through BlueHost, which is the easiest thing to do if you are planning on using BlueHost for web hosting.
As an aside, if you already have purchased a domain elsewhere, you can chat with Bluehost’s 24/7 chat support, and they can walk you through exactly how to transfer your domain to Bluehost or get it working with your web hosting.
The domain name or URL of your website is the address of your site.
For instance, jasminealley.com is this website’s domain name/URL.
Many people ask me if they should use their personal name or a corporate name for their URL.
For instance, we used Jasmine’s personal name for our URL: jasminealley.com instead of a corporate name like mytravelblog.com
Here’s a table to help you think through which URL type is better for you:
| Domain Name Type | Pros | Cons |
| Personal Domain Name | People tend to trust and follow personal brands more readily than corporate brands. For instance, personal Instagram profiles usually grow faster than corporate profiles. | The weaknesses of a personal brand tend to be the strengths of a corporate brand with scaling and selling a personal brand presenting particular difficulties. |
| Corporate Domain Name | It’s easier to scale and sell a corporate brand than a personal brand. For instance, it’s easier to be brand authentic if you want to hire writers to help scale a brand like mytravelblog.com than jasminealley.com. Selling a brand like mytravelblog.com is also easier than jasminealley.com because any individual or team can take over corporate ownership but the opposite is harder. | The weaknesses of a corporate brand are also usually the strengths of a personal brand. People are less likely to trust a corporate brand and it may grow more slowly in the beginning. |
In general, I recommend using a corporate brand name and URL but associating your identity with it as well.
For instance, that’s what I do with lifestylebizness.com where I prominently feature my name and identity on the about page but have chosen a corporate rather than personal brand name and URL.
Even though this is what I recommend, know that your brand can still succeed as Jasmine’s has with personal branding!
Now back to the Bluehost setup:
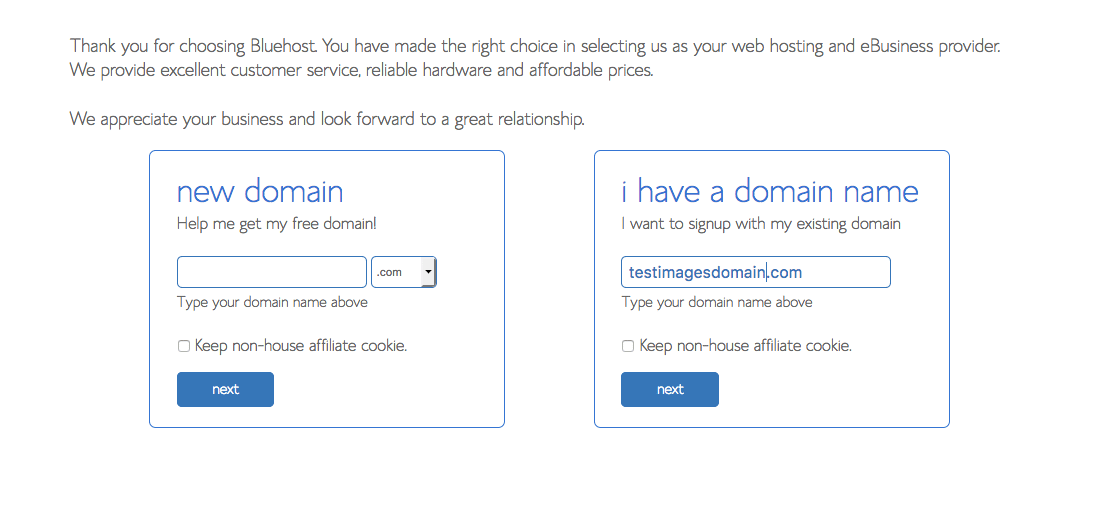
- When prompted, enter the domain name that you want and hit “next” to see if it is available.
- If it has already been taken, you will see an error message letting you know it is unavailable.
- If you’re having trouble finding a domain name you want, try adding the to the beginning and/or blog at the end. For instance, you could try thetravelblog.com instead of travel.com.
- Also, try to use easy-to-spell words in your domain name that have a low likelihood of being misread. For instance, at one point I owned the domain name profitanywhereblog.com and people made fun of it for sounding like profanity anywhere blog. Obviously, this wasn’t the best domain name.
- You’ll need to pay at this point
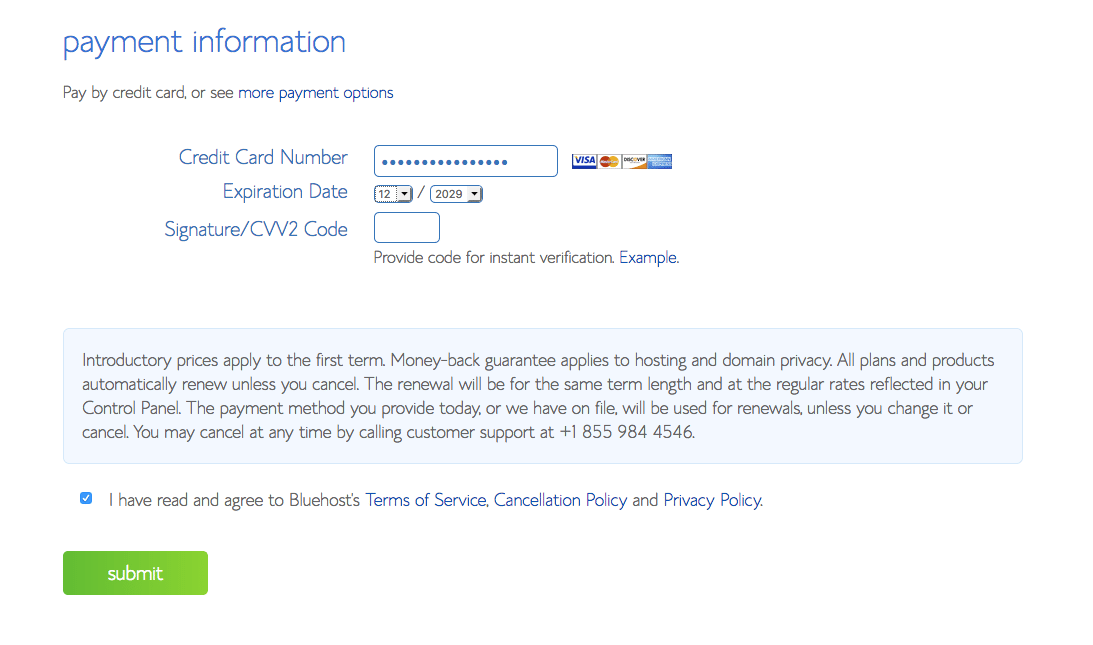
- And create your login password

Keep in mind this login information is for your Bluehost web hosting, not for your WordPress.org website.
I’ll describe how to log into and access your site in the following section.
Install WordPress With the Click of a Button
At this point, you have purchased web hosting and your domain.
But you still need to install WordPress on your site.
Thankfully, this process is super simple with Bluehost!
They typically have a one-click option to install WordPress on your domain, and they usually guide you through the process every step of the way.
Choose a Theme
Once WordPress is installed and as a part of the process of guiding you through setting up your site, you might see a screen that looks something like this.
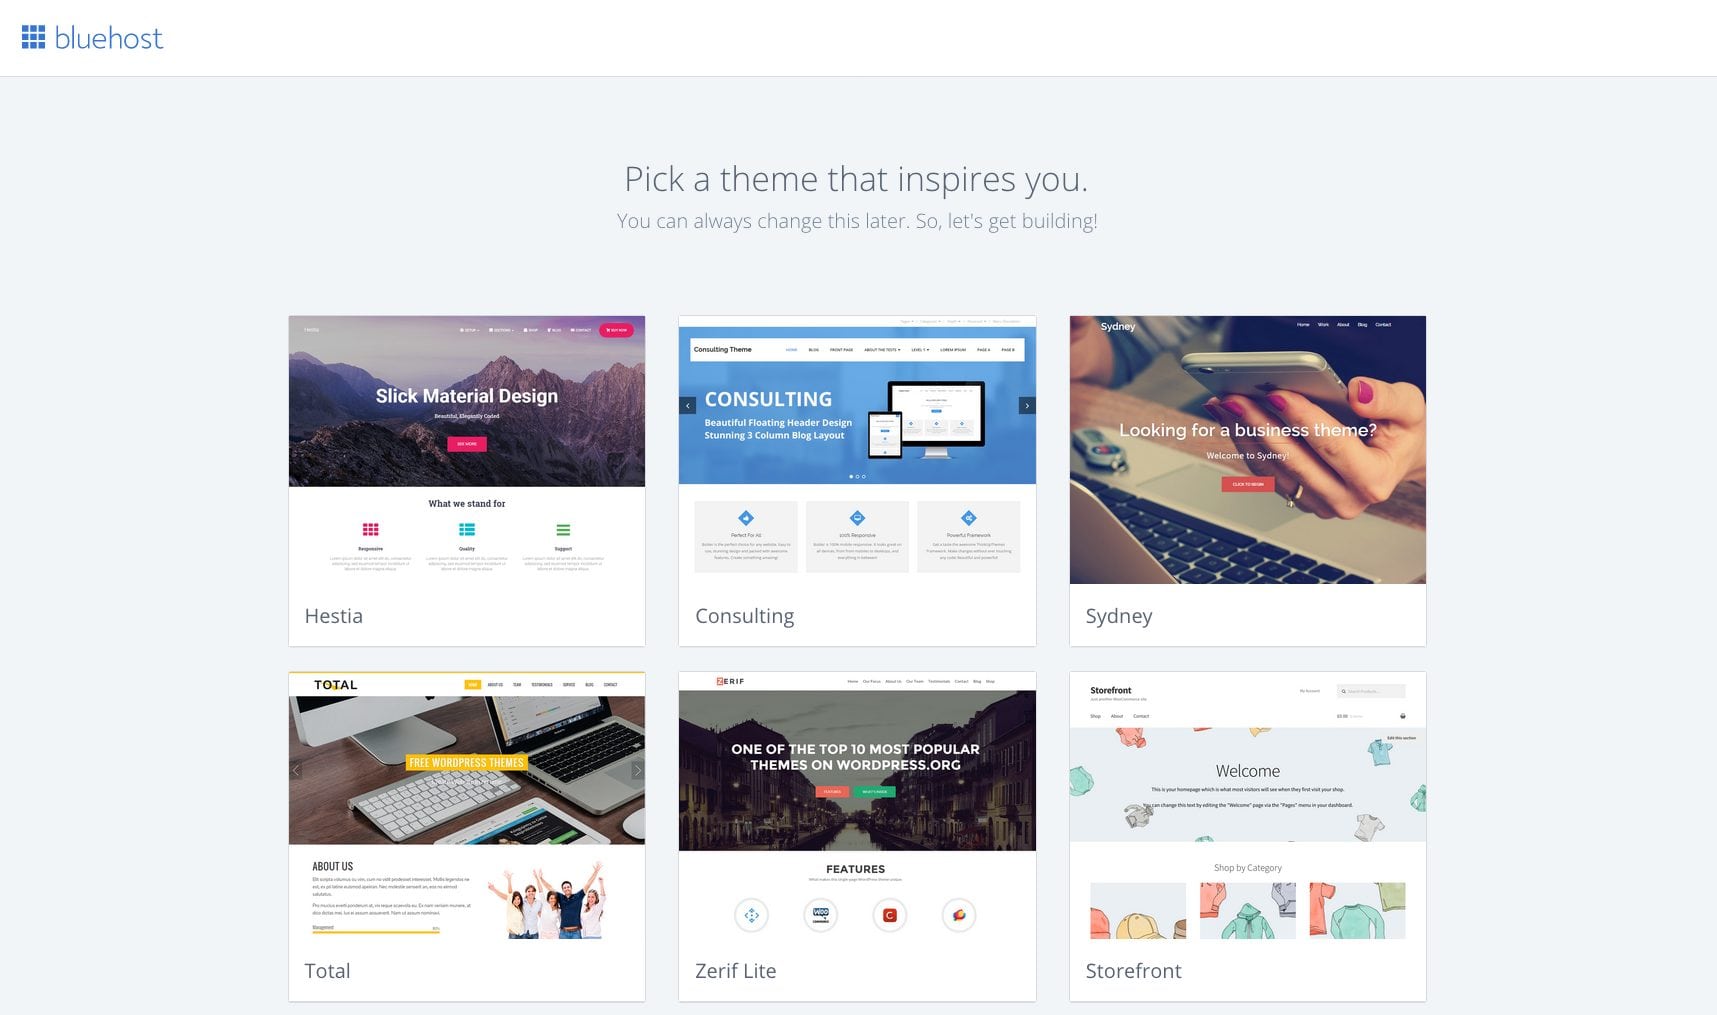
What’s a theme? Its the skin, layout, or looks of your site.
Any developer can publish a theme which means there is a wide variety of differences in type and quality of themes.
There are also free and paid themes.
For instance, Jasmine and I use a paid theme called Hello by Elementor on this site.
This theme is lightning fast and has a front-end, drag-and-drop page editor which means you can design exactly the sort of page you want visually and intuitively without writing any code.
(If you purchase this theme through my links, I will receive a commission but you won’t pay any more than you normally would! Again, I only recommend products I use and love.)
Hello by Elementor also has awesome templates so you don’t have to start from scratch when designing a page.
Lastly, paid themes typically have more features and better support than free themes which are both some of the reasons why we use Hello by Elementor.
The good news is, your theme really doesn’t matter when you first launch a blog.
Why?
Hardly anyone is going to visit your blog at first.
In fact, it will likely take years for you to get significant traffic to your blog!
So feel free to choose a free theme in the early days of your blog, and consider upgrading when you are getting more traffic and want to deliver a better user experience to your readers.
As far as free themes go, I like Sparkling by Colorlib.
But again, don’t sweat choosing the perfect theme at first.
I recommend just choosing one quickly and focusing on publishing a lot of high-quality content.
Lastly, themes are supposed to be interchangeable.
So switching your theme should preserve all your website content and only change the layout or look of your site.
Sometimes a change between themes isn’t quite seamless.
For instance, one theme might have a feature that you put on some pages in your site that isn’t available in your new theme.
But don’t worry about losing all your content when you switch themes.
Again, WordPress themes are designed to be interchangeable.
Your WordPress Dashboard
You may see something like the image below welcoming you to your dashboard after you’ve chosen a theme.

Here is your WordPress Dashboard where you can publish content to your site.
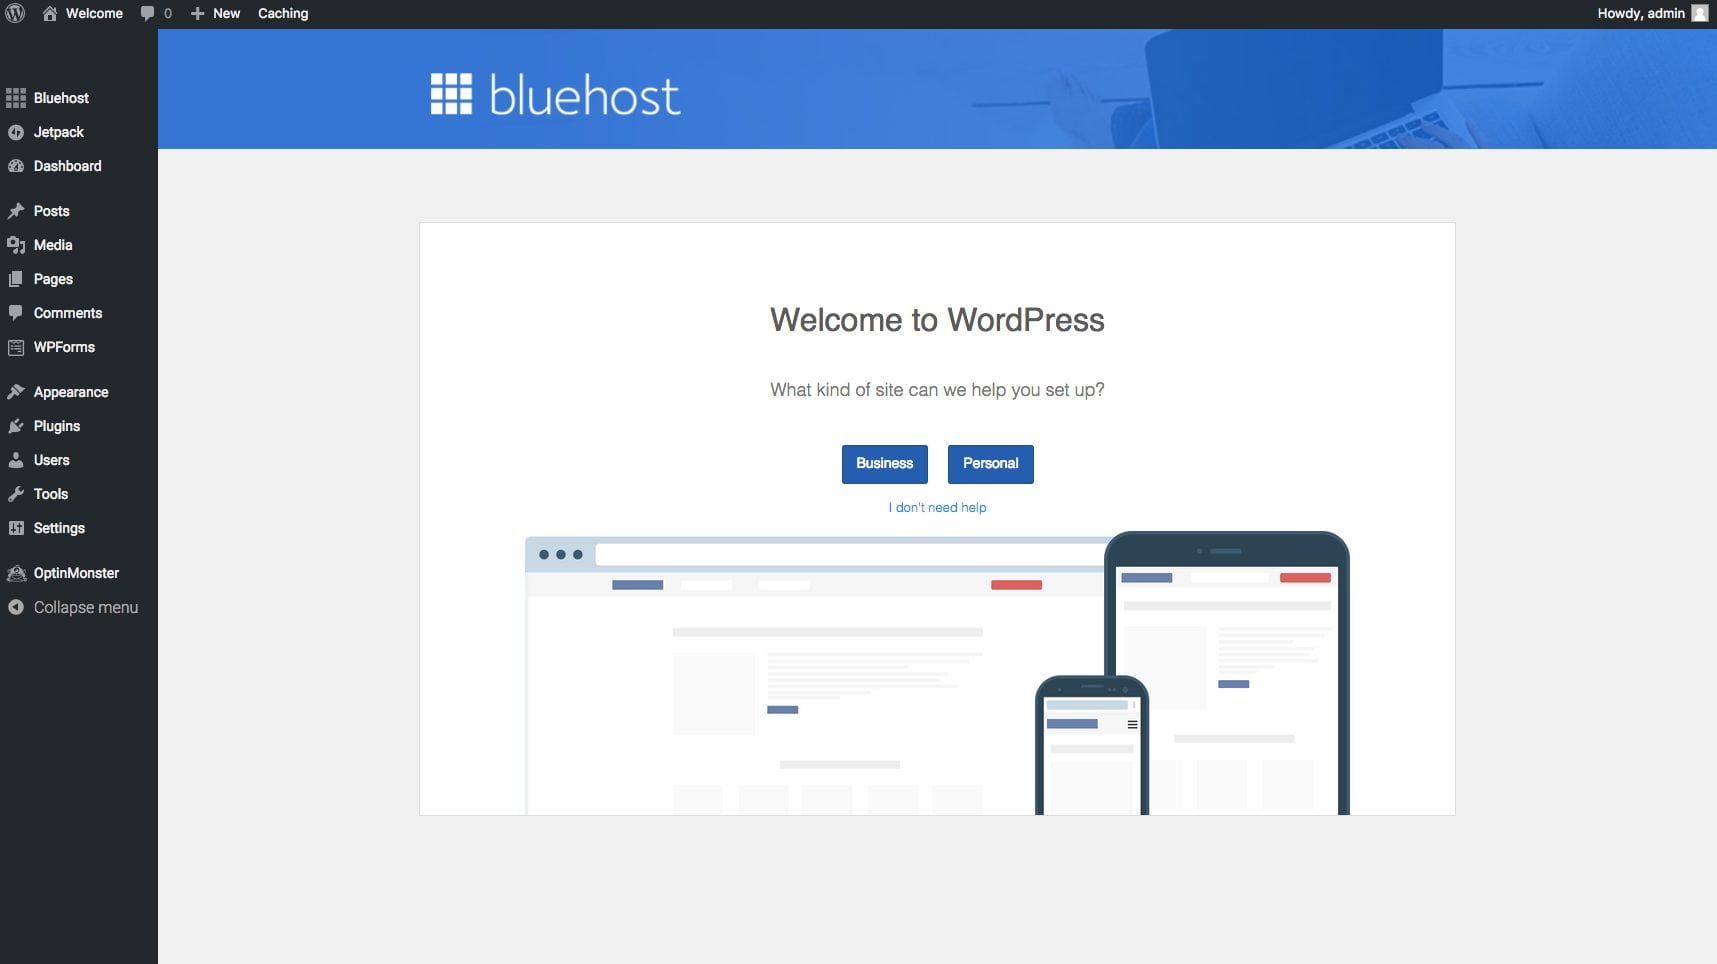
Use the tools on the left-hand side to navigate through WordPress.
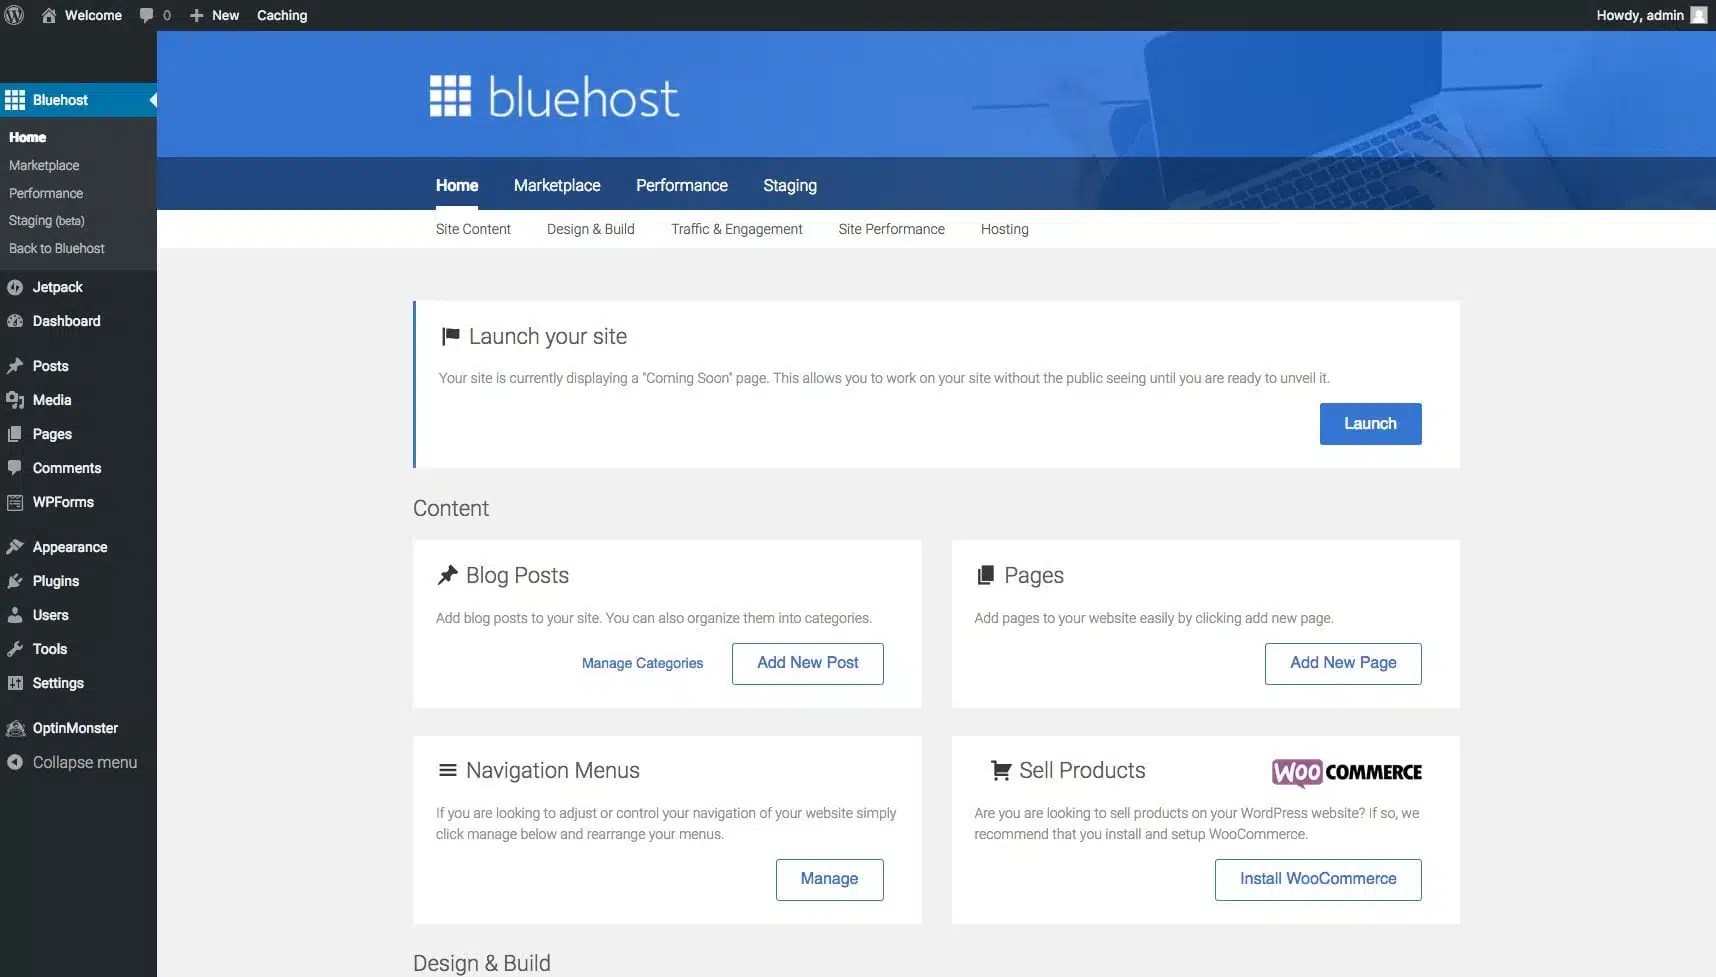
You may see a screen like this:
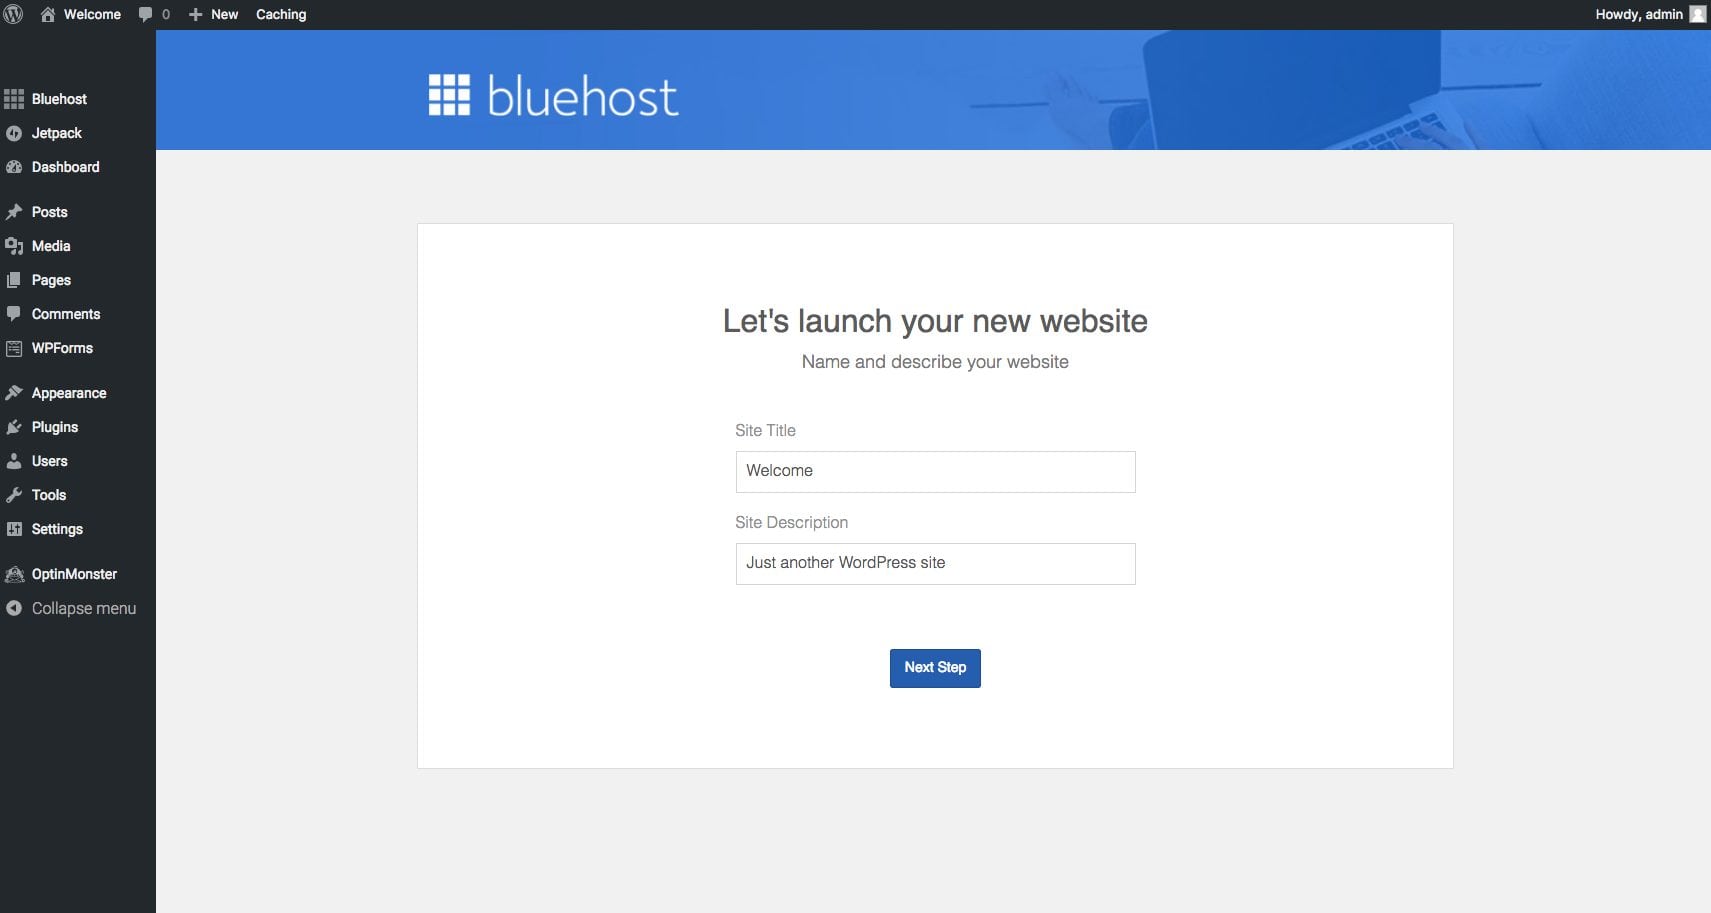
If you do, feel free to launch the site immediately.
There’s no point in waiting to launch it because no one is going to visit your site on day one anyway.
Accessing Your Site Going Forward
Now that you’ve set up your site, you should be able to access the WordPress dashboard by visiting: yourwebsite.com/wp-admin
For instance, if your blog were mytravelblog.com, you would log in to your WordPress dashboard at mytravelblog.com/wp-admin
There you can enter your WordPress username and password which should take you to the WordPress dashboard in the image above.
Please note, This is NOT the same as your web hosting username and password to log into Bluehost.
If you don’t know your WordPress username and password, don’t worry about it. You should be able to do a username/password reset on the login screen.
Also, I believe you can access your WordPress dashboard through Bluehost. However, for efficiency’s sake, I recommend logging in via your site’s address.
How to Add Content to Your Site: Posts vs Pages
Now your site is ready to populate with content!
As a quick clarification, you will see on the left-hand side of your WordPress dashboard a post and a page section.
You will click on either of these when you want to publish either a post or a page.
A page is a largely static piece of content and usually, there’s only one page per type.
For instance, you might have a contact page or an about page that you update periodically.
But you probably wouldn’t have multiple about or contact pages.
Posts on the other hand are pieces of content about a particular subject.
You might have a post about how to lose weight or the healthiest meals you can make on a tight budget.
There’s really no limit to the number of posts you could have.
In general, successful blogs have a handful of pages (like contact, about, etc.) and hundreds and maybe even thousands of posts.
I’ll discuss the volume of content you might expect to produce in the following sections.
How to Generate Income
Up until this point, I’ve really only discussed the mechanics of how to set up a blog.
But setting up a blog is just the first step in learning how to start a travel blog and make money.
Most people can set up a blog.
But few people develop a blog into a successful business.
Why?
Blogging usually takes a long time for financial success, and most people just aren’t patient enough to wait the years it often takes to succeed.
For instance, Jasmine worked on this blog for two years before earning any income from it and it took us another two years to make a full-time living from it!
That said, our patience paid off and we now have a passive income business with limitless earning potential that allows us to live the life of our dreams!
So how do we do it?
Read on to find out.
How Blogs Make Money
Blogs, like brick-and-mortar storefronts, can make money in countless ways.
A blog owner can sell his own product or service, someone else’s product or service, a subscription, ads, and more.
The primary way we monetize this blog is through display advertising.
For instance, most pages and posts on this site have display ads served on behalf of other companies via the ad network that we are a part of called AdThrive.
AdThrive works with companies to insert their ads on our site.
We don’t work directly with the ad companies, only AdThrive.
In exchange for managing the ad process for us, AdThrive takes a cut of the money earned from ads served on our site.
And each month, AdThrive deposits our cut of the money in our bank account.
Display Advertising vs Other Monetization Methods
People say that display advertising is both the easiest and least profitable way to monetize an online audience.
It’s the easiest because all you have to get is get traffic and you get paid every month.
It’s also often one of the least profitable because display ads earn fractions of pennies per pageview whereas selling your own product or service, although likely more stressful, also has the potential to earn more per pageview.
However, I think display advertising is the best way to monetize for beginners because it only requires one skill: getting blog traffic.
How We Drive Traffic for Display Advertising Success
I spent years reading about strategies to drive traffic and trying to make it work through trial and error.
I have launched and shut down several websites, and I almost sold my site, studentofguitar.com, before it started generating material traffic.
But Jasmine and I have finally established a method of generating traffic that works for us.
It’s called SEO.
If you aren’t familiar with it, SEO stands for Search Engine Optimization.
SEO is basically the study of how to rank in search engine results (like Google search results) for a given search term or phrase.
Although it sounds intimidating, the basics of SEO are really simple!
The simple recipe for success with SEO is to create the best online resource in response to a given search phrase.
If you do this, your website has a good chance of ranking in the top few search results for that search term.
Plus, that traffic generates steady ad income that pays regularly for months and even years to come, compared to one-time traffic from social media.
The Math of Display Advertising Success
Monetary success with display advertising is a numbers game.
One of the most important numbers in display advertising is the revenue per mille (RPM) or revenue per thousand visitors received by the blog owner.
For a blogger with an audience mainly from English-speaking countries on a premium ad network like AdThrive or Mediavine, you might get an RPM of $15 to $25.
(This RPM range is somewhat conservative. As you can see here, we’ve had much higher RPMs on this site but we do many things to increase our RPM).
That means for every 1,000 monthly visitors you might make anywhere from $15 to $25.
From here, you can do the math and find that every 100,000 monthly visitors could make you between $1,500 and $2,500+ visitors.
Thus, to make a living from display advertising alone, you’d likely need 200,000 – 300,000 monthly visitors.
Backing into this number of monthly visitors means you will probably need to write 200 – 400 articles.
And if each article takes you 2 – 4 hours, you’re looking at 400 to 1600 hours of work.
Now we can estimate that if you commit to working on your blog 10 hours a week, making a living from display advertising alone on your blog will probably take you approximately 1 to 3 years.
I know this probably isn’t what you want to hear.
But I think it’s a roughly accurate assessment.
And I wish I had found a resource at the beginning of my journey that was this clear about setting expectations.
In fact, I think Jasmine and I would have achieved success much more quickly if we had managed expectations in this way and focused relentlessly on this goal.
Although getting this volume of traffic will be challenging, it can also be extremely rewarding.
As I mentioned above, ads are often considered one of the least profitable ways to monetize an online audience.
So if you manage to have significant financial success with display advertising, you can likely experience even more success with a more direct way of monetization like selling your own product or service.
Conclusion
I hope this post helped show you how to start a blog!
