Flower crowns are all over Instagram. From girly beach shots to portrait photos, they’re a fun way to spice up your Instagram photo to achieve a whimsical or even more delicate look.
Outside of photos, they’re also lovely accessories to wear for romantic occasions – like a bridal shower (if you’re the bride) or even a wedding (if you’re one of the bridesmaids!)
Lately, I found myself looking wistfully at gorgeous photos with floral crowns (like this one or this one), wondering how they got their flower crowns.
Aggie and Lisa, the two women from my examples, probably were gifted theirs since they’re famous Instagrammers, but what about the rest of us? We can’t all be so lucky and expect to be recipients of this type of gift!
Of course, there are always simple daisy chains, clover, or dandelion-type of floral crowns to DIY and wear. However, sometimes you just need those that are more ornate and elaborate – especially if you’re posing for a pic!
So where can you purchase the type of crown that’s made of huge roses or even silk flowers without breaking the bank?
Well, last weekend I really wanted to have the perfect flower crown in one of my posts- they’re just so gorgeous!
Plus, it seems like all of the best Instagrammers out there are doing it.
And why not?
A flower crown meets so many “requirements” for a picture-perfect Instagram post:
- They’re pretty
- They have flowers (always a bonus!)
- They’re unique
- They act as the focal point of the photo
- They bring natural colors and natural elements to the post
Obviously, those things are subjective, but long story short, I’ve seen them everywhere and decided to try my hand at making a flower crown!
Here is a tutorial and step-by-step guide on how to make your own with artificial flowers.
The same easy steps can be applied to fresh flowers; you’ll just have to be more careful about being delicate with the petals when you’re working with them.

Step 1: Gather materials for your DIY Flower Crown
Gather your flower crown materials. You’ll need:
- Wire cutters
- Wire / Pliable twine / Floral wire
- Tape / Floral tape
- Flowers
- Leaves or your choice of greenery
- Floral scissors or any sharp pair of scissors
- Hot glue gun (optional)
TIP: choose different sizes and shades for both your focal and filler flowers. It makes your ensemble more varied and interesting.
Also, set aside at least an hour for this project. The whole process will most likely take at least that long.
And don’t forget to choose a safe spot to work on especially if you have little ones around the house! You’ll be working with scissors and wires, so it’s better to be safe than sorry!

Step 2: Make the flower crown circle
Next, measure a halo around your head with the wires to start making your crown base.
TIP: It’s okay if you make it too big, but you’re in a tough spot if you make the wire circle too small. This is why pre-cut wires aren’t really recommended since you need to try and get the exact measurement of your head as much as possible for the best fit, and you’ll hit a snag if the pre-cut wires are too short.
Also, when making the flower crown circle, you can use pliable twine, grapevine wire, or vine wire in place of a roll of craft wire if you prefer! Basically, whatever wire you have on hand may work in this DIY crown.
After you’ve made the wire circle, you can twine any excess wire at the ends of the crown around the other – as I did here.

Step 3: Cut up your flowers
Trim your stems. You’ll break up the bunches into individual stems using your wire cutters (or flower cutters if you’re using real flowers).
TIP: try to leave about three inches of stem so that when it comes to taping you have plenty of room to secure it to the wire circle.

Step 4: Tape flowers onto your flower crown circle
Start taping the stems to the wire halo.
I started with the larger flowers and made my way around. You can roughly plan out your flower order before taping.
TIP: keep the green tape taut so that it does its job (it won’t stick if it’s loose).

Step 5: Consider your flower spread
You can choose how you want your flowers to be spread throughout. For my project, I placed the flowers in the front with some leaves behind them.
I also tapered the size down (ie. big flowers in the front and smaller ones on the sides). However, you can choose to put some statement flower bunches around your floral crown for the added wow factor!

Step 6: Continue adding flowers all around
Go all the way around as you layer one bloom over another. Measure the crown against your head circumference to ensure the right fit. You can tighten it by twisting a section off if it’s too loose.
TIP: Make sure your flowers are all facing the same direction! Flowers with flexible stems are great here since you can easily bend them to make sure your flowers are facing out.
If you see any awkward gaps in your flower crown, you can use hot glue to stick smaller flowers or any piece of greenery into these spots to achieve a more balanced look. For this purpose, you can choose to use wax flowers, spray roses, or feverfew for the filler flowers, or myrtle, ivy, or dusty miller for the greens.
Et voila! You’re done!

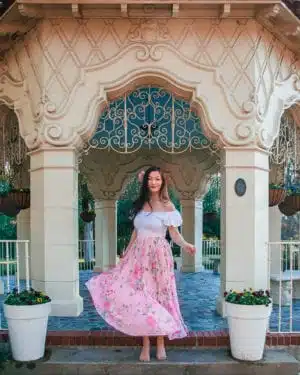
Step 7: Show off your DIY flower crown
I loved the way mine turned out! It’s such a fun way to bring some girly romance into a photo.

And if you want to capture a really good photo- how about upgrading your camera gear?
See what I use to capture my photos as a full-time travel blogger here!
That’s it! Go have fun with your flower crown!
Happy creating,
Jasmine
Save these steps for later by sharing this post on Pinterest! You can click on the red Pinterest button or use either of these images for easy pinning!