The Harding Icefield in Kenai Fjords National Park is truly a wonder to behold!
Located atop Exit Glacier where it stretches for 700 square miles, it’s the largest icefield wholly contained within the United States. From stunning vistas and the adventure of reaching the breathtaking peak, the Harding Icefield is truly worth the climb!
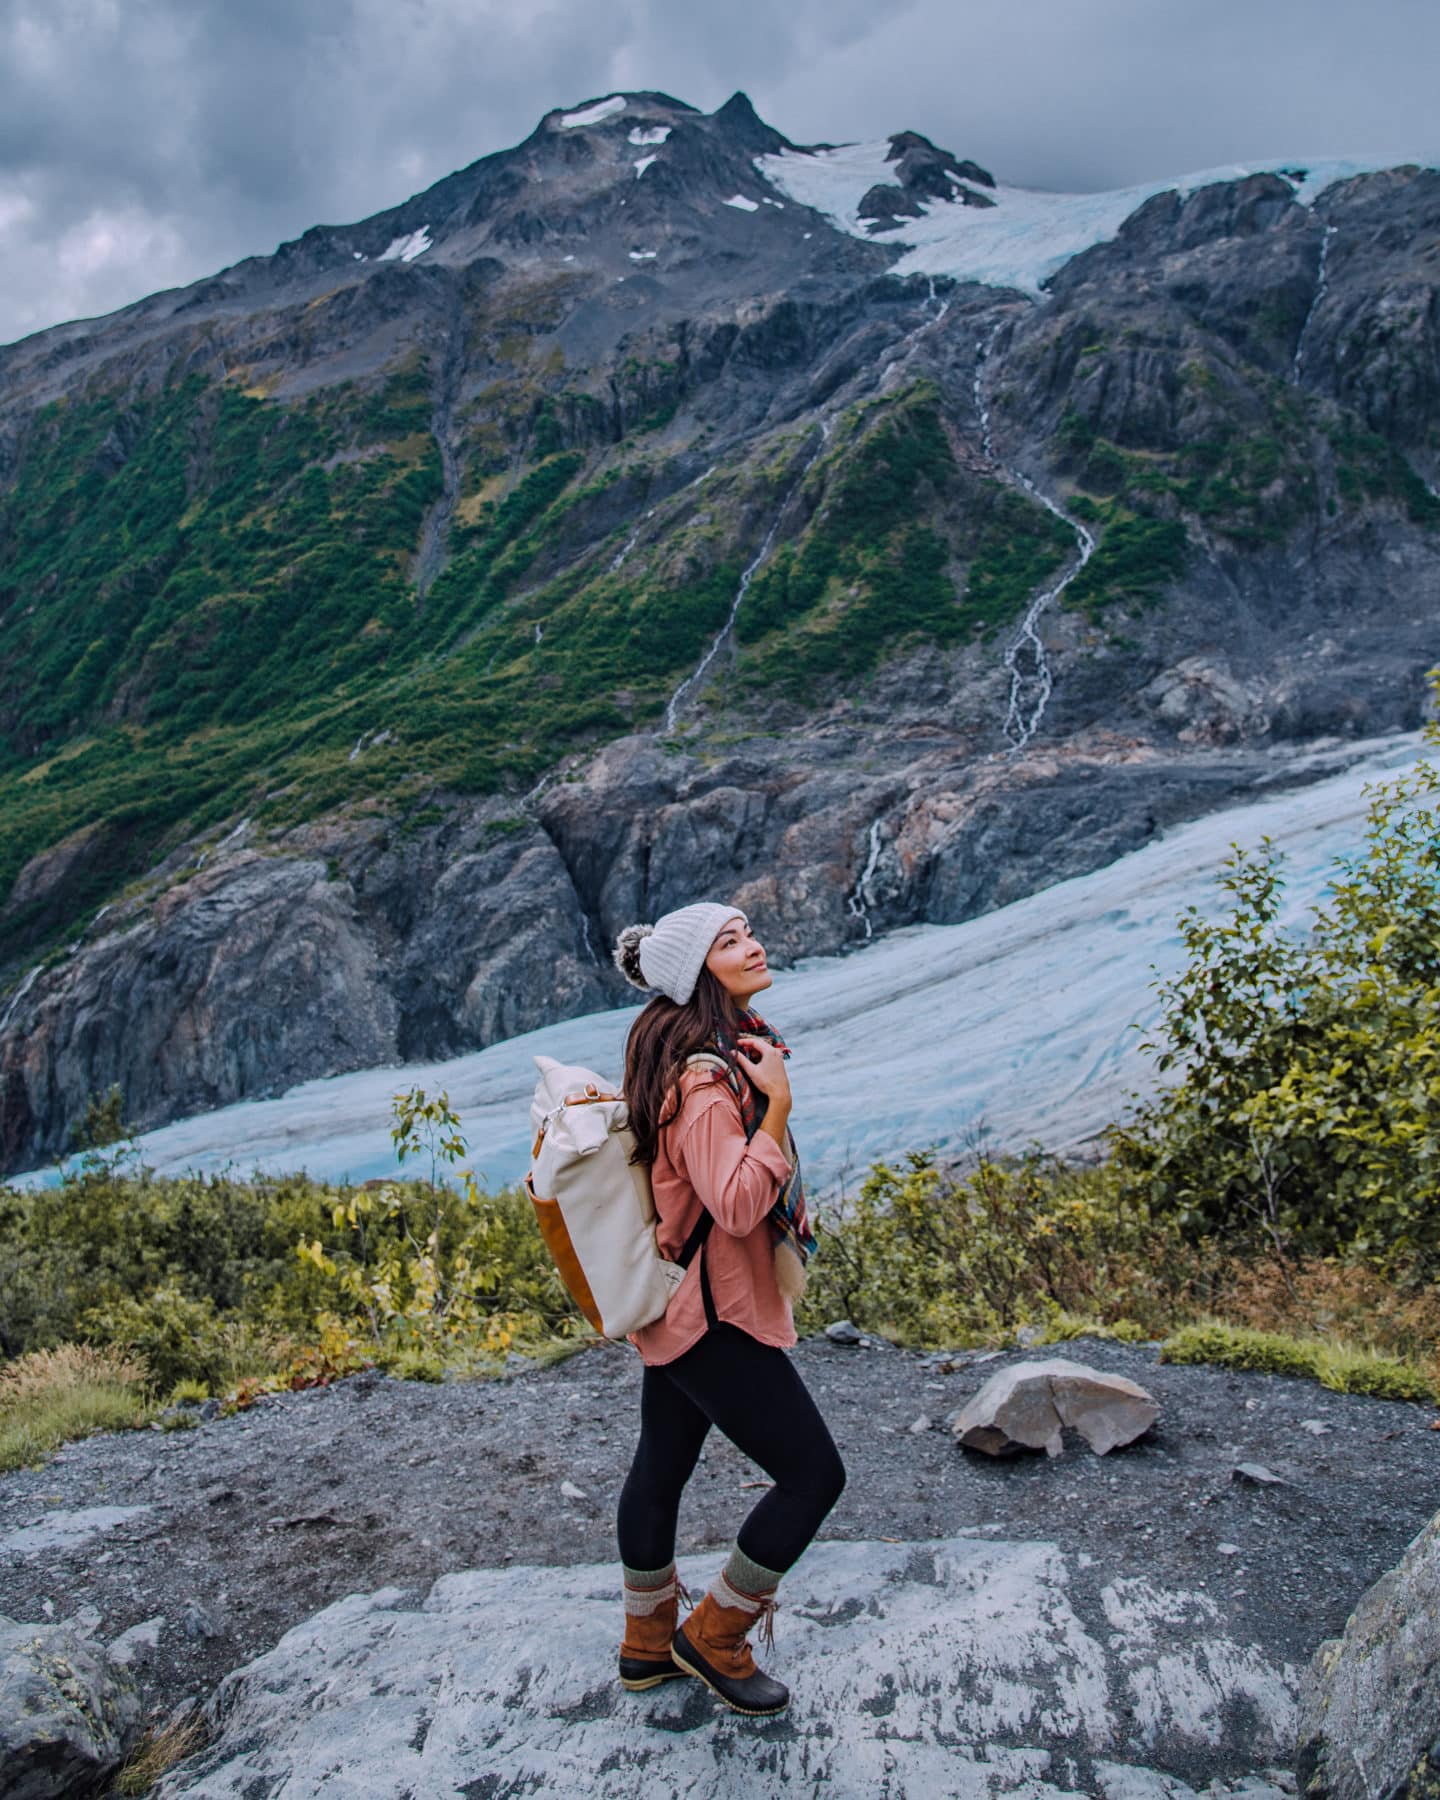
We did the Harding Icefield Hike at the end of August and were constantly wowed by the beauty and gorgeous views.
Sidenote: you can see some of the amazing views we got to see in Alaska in the video we made from our trip!
[If you don’t see a video below, you may need to disable your ad blocker.]
There’s a reason why it’s considered the best hike in the Kenai Peninsula! So here’s everything you need to know before embarking on the Harding Icefield Hike.
The Harding Icefield

So what is this icefield you’ll be hiking to, anyway?
Well, it’s a ginormous stretch of land atop the mountains in Kenai Fjords National Park that is covered in… you guessed it… ice!
Yup, it’s literally a field of ice, hence the name. In fact, as I mentioned earlier, the Harding Icefield is 700 square miles of ice!
So what’s the difference between a glacier and an icefield?
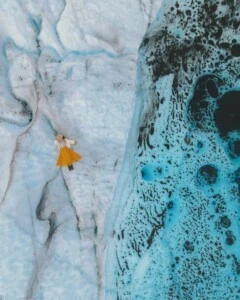
An ice field is actually a large area of interconnected glaciers. What you see in the photo is Exit Glacier as it stretches down from the Harding Ice field. It doesn’t even encompass how giant the ice field is! Over 40 glaciers flow from the Harding Icefield, but Exit Glacier is the only one you can hike beside.
Reaching it takes time, sore legs, and patience, but the view of the ice field is incredibly rewarding!
The view you see in the photo above is not even from the top of the hike – only from halfway! (More on that later.)
What to Expect

Let’s get into everything you’ll need to know before setting out on the Harding Icefield Hike.
The Harding Icefield Trailhead

The Harding Icefield trailhead is approximately a 20-minute drive (about 3.7 miles) north of Seward in Kenai Fjords National Park. (On a larger scale, it lies in the Kenai Peninsula about 125 miles south of Anchorage. If you’re looking for more weekend getaways from Anchorage, check out this post!)
In fact, it’s the only land entrance into Kenai Fjords National Park.
When driving, you’ll see a clear sign signaling the turnoff point from the Seward Highway: mile 3 to Exit Glacier Road (aka Herman Leirer Road).
Proceed for another 8.4 miles and the road will lead you straight to the parking lot of the Exit Glacier Nature Center.
If you don’t have a car, you can take advantage of the shuttle services that depart from Downtown Seward. One such example is the Exit Glacier Shuttle, which you can check out here.
The shuttle drops you at the parking lot and then picks you up later in the afternoon.
But this may not be the best option if you want to enjoy the views without feeling rushed. With the shuttle, you’ll have to be careful not to miss the return time, and there is barely any cell service around the Exit Glacier area. (The lack of cell service is something you might find in a lot of places! Check out this post on 34 crucial things to know before visiting Alaska for some more useful information!)
Once you’re in the parking lot, your hiking adventure will begin right by the Exit Glacier Nature Center through the Glacier View Loop Trail.
From here, you’ll follow the Exit Glacier Paved Path for roughly 0.3 miles. The path zigzags through cottonwood and alder forests.
This trail eventually becomes the Glacier Overlook Trail. After a while, you’ll reach the Harding Icefield trailhead, which is on the right side of the path.
The whole trail takes approximately 8 hours: about 4 hours to hike up and about 3-4 hours to descend.
For this reason, it’s best to treat the hike as a full-day excursion and set out early in the morning!
That way, you’ll have enough time to enjoy the views along the path at a leisurely pace and make it back down just before dusk.
And trust me, once you’re done with this hike, your legs will feel too much like jelly to do anything else the rest of the day!
Trail Difficulty

Although the distance from the parking lot to the top of the trail is roughly 10 miles round trip, the trail itself is 8.2 miles round trip.
However, the challenging, strenuous climb makes the hike seem longer.
You experience roughly 1000 feet of elevation gain per mile! And trust me, your legs will feel it (unless you’re some sort of Olympic athlete, which I most definitely am not!).
While the trail is well maintained with plenty of switchbacks along the path to limit the steep segments, you need to be reasonably fit to make it up to the top.
From the valley floor, the trail weaves through bushy terrain, gaining elevation steadily while breathtaking views open up periodically.
The trail extends upward through different ecosystems.
First, you’ll wind through the forest, then, through a beautiful tundra meadow, and lastly, rocky terrain.
From there, the ice field at the top stretches as far as your eyes can see.
And you’ll definitely want to keep your eyes open the whole time for wildlife!
Wildlife

There is plenty of wildlife to be found around the Harding Icefield!
It’s not uncommon to spot black bears, brown bears, mountain goats, moose, marmots, birds, or anything else along the way.
We saw a black bear way off in the distance while we were at the Cliffs area (more on The Cliffs in a bit. Also it was my first time seeing a bear in the wild!).
A marmot made its way across a hill near us (it was my first time seeing a marmot!).
And a couple of hikers told us they saw a moose and its calf cross the trail right in front of them!
Stopping Points on the Harding Icefield Trail

The views from the top of the trail are unbeatable, but you don’t have to go all the way to experience the magic at the summit.
A shorter hike up the trail commands impressive panoramas of the valley floor, Exit Glacier, and the Harding Icefield.
So if completing the entire trail seems outside of your wheelhouse, there are great viewpoints just a couple of miles into the hike.
They give you amazing views of Exit Glacier and partial views of the icefield.
Marmot Meadows
The first you’ll reach is Marmot Meadows, which gets its name from hoary marmots that may be spotted in the area. It is about 1.4 miles above the treeline, where the lush green forest falls away and you approach an open meadow.
You’ll see a path split off from the main course on your left. Take the left fork and you’ll reach a clearing that is perfect for a picnic or simply to take in the views!
Barring bad weather, it’s worth it to keep going to the Top of the Cliff at the very least!
You’ll get way more views there, and the hike becomes more scenic than the first stretch you’ve already done.
Top of the Cliff

My recommendation: opt to push through to the Top of the Cliff (2.4 miles). The Cliff is halfway through the entire trail.
Hiking from Marmot Meadows to Top of the Cliff is a lot more fun, to me at least. The views along this stretch of the hike are way better since trees are no longer in your way.
You also get a glimpse of the Icefield along with the majestic mountains surrounding the area.
The Harding Icefield

The trail comes to an end at a rugged rocky overlook with a sweeping view of the stunning icefield.
We actually didn’t get to go all the way to the icefield due to a storm that rolled in. But honestly, I don’t think I would’ve had the strength to go all the way to the top! My legs already felt like jelly when I got to the Top of the Cliff viewpoint!
When to Visit Harding Icefield

Kenai Fjords National Park is technically open throughout the year.
However, the best time to hike the Harding Icefield Trail is during the summer months, primarily between June and October.
The roads leading to the trail can be impassable by car, so they’re closed once heavy snows come in.
Another benefit of visiting in summer is the mild, temperate weather. The temperatures are mostly in the 70s during the daytime and 40s at night. These mild temperatures are perfect for hiking.
Nonetheless, it’s important to note that the weather in the area is still highly unpredictable and can change at any time of the day.
When we went, a storm was rolling in, which meant we had to keep an eye out for impending rain and pack plenty of waterproof and/or rain gear.
What to Bring

- Water – bring about 2 liters per person to be safe. It would be a shame to turn back and miss out on the whole trail after running out of water. Alternatively, you can pack a purifier or life straw as you’ll come across a few streams along the trail where you can stop and drink water and fill up your bottle.

- Sunglasses – with the sun shining off the snow, the glare can be almost blinding. You may not need sunglasses throughout the entire trail. However, once you’re up close with miles of icefield the sunglasses will come in handy.
- Bear spray – the Harding Icefield Trail is nestled in bear territory and you might have a surprise bear encounter… yikes! Put the bear spray where you can easily reach for it if the need arises. If you come face to face with a bear you won’t have enough time to retrieve your spray from the backpack. Be sure to make a lot of noise while hiking. In most cases, the bears will be a safe distance away. As long as they’re minding their business at a far distance, you should do the same.

- Bug Spray – in case there are insects like mosquitoes around!
- Trekking poles – you can do just fine without trekking poles/a hiking stick, but they can be super helpful, especially when winding through snowy terrain and on your way down.
- A camera – you’ll come across dozens of picturesque spots on the trail and you might want to capture those breathtaking moments. Here’s what’s in my camera bag!
- Waterproof clothes – you’ll definitely want a rain jacket if it starts raining! I got this one off Amazon and love how it is so light!

- Wool or synthetic socks – this material is best when hiking since it dries quickly!

- A hat – a beanie like this one is perfect since you can easily pack it away when you don’t need it.

- Sunscreen – that Alaskan sun can be stronger than you’d think! Here is some reef-safe travel sunscreen.

- Sturdy hiking shoes – make sure they’re shoes you’ve hiked in before!
- Will power and exercise beforehand – it might be helpful to gear up for the hike a few weeks before so that the real adventure will be more enjoyable and less of a grind!
Camping by the Harding Icefield

To squeeze the most out of the Harding Icefield you can enjoy the hike by the day and then camp overnight. There is no parking fee and camping is also free.
There is a free ‘tent only’ campground close to the Exit Glacier Nature Center.
You can also camp along the trail under some conditions. Here are a few:
- You should set up your tent at least 1/8 miles from the trail.
- The tent should either be on the snow or bare rock (to preserve the area’s fragile vegetation). The alpine flora can take a while to grow, especially because this trail is highly trafficked. Camping on vegetation is destructive which can be pretty devastating.
- You should follow the ‘leave no trace’ principle to a tee. This includes packing all litter!
- There is a trail shelter at the top, but it’s used for emergencies only – meaning you can’t camp in this emergency shelter.
- Instead of lighting up a campfire, you should consider using a stove. This will minimize the impact of the campfires and preserve the pristine environment for future generations.
- There are no toilets on the trail. You should dig a small hole to do your ‘business’. And make sure the hole is at least 100 feet from any water sources or streams. The hole should also be 100 feet from the trail.
Harding Icefield Trail Hiking Tips

- To completely enjoy the hike and give enough time to take in the views at the top of the trail, get an early start. Ideally, start before 10 am.
- The weather can be unpredictable and the winds traveling down the mountain can be pretty chilly. Be sure to dress in layers so that it’s easy to remove or add clothes as the temperature changes.
- Bring lots of snacks such as energy bars, granola bars, or a picnic if you’re going all the way to the top. Also, remember to bring a bag to pack your trash into because the trail doesn’t have any trash cans.
- Review trail conditions and the weather before starting your hike. Sometimes, even in early July, the areas close to the top of the trail are snow-capped. These conditions can make hiking impossible (and in the worst-case scenario can even trigger avalanches!).
- Listen to the safety briefings and tutorials from professional guides. Anything can happen on the hike; you never know when the info you get from these briefings will be helpful!
- There are picnic tables right next to the parking lot where you can stop for a snack before hiking. The picnic area is also a great resting place after a long day on the trails.
Now that we’ve covered all of that, let’s talk about the national park that houses the Harding Icefield!
Kenai Fjords National Park

Kenai Fjords National Park hosts some of the best of Alaska’s beauty within its massive rugged and dramatic landscape.
The park is at the edge of the Kenai Peninsula and it’s home to the Harding Icefield, Exit Glacier, and a ton of glaciers that can only be accessed by boat or helicopter.
(Check out this post on the 36 best things to do on the Kenai Peninsula!)
There are three main ways to experience the Kenai Fjords National Park: by foot, boat, or helicopter ride.
If you choose to explore on foot, there are a few different trails with different levels of difficulty.
That means there’s something for everyone, especially the Exit Glacier trail, which is also wheelchair accessible!
Exit Glacier

Exit Glacier is one of the most visited places in Kenai Fjords National Park thanks to its accessibility.
It’s one of about 40 glaciers that descend out of the massive Harding Icefield.
This enormous wall of ice descends the mountain from the Harding Icefield and goes down all the way to the Resurrection River.
There are a few trails that lead from the parking lot to various parts of the lower section of Exit Glacier. You’ll find intertwined trails which means you can do multiple routes without starting over.
The network of both walking and hiking trails leads to different viewpoints of Exit Glacier.
The hikes are also way easier compared to the Harding Icefield Trail.
You’ll get to go up close to the glacier and see the dramatic landscape left behind by the retreating glacier while also enjoying some of the most astounding natural scenery that the area has to offer.
Boat Tours

Most parts of Kenai Fjords National Park can only be accessed by water.
No wonder boat tours are a common way to explore the Park – especially with visitors who are eager to come up close to the glaciers. Here’s a popular boat tour option that does just that!
Holgate Glacier and Aialik Glacier are the most popular ones to see by boat. On the water, you can see the glaciers calving (when chunks of ice break off), which is a wild experience!
You can also charter a boat and take in the views at a leisurely pace.
With a boat ride, you also enjoy wildlife and marine life spotting opportunities!
You might come across humpback whales, Steller sea lions, puffins, harbor seals, and different species of seabirds.
Helicopter Tours

Helicopter rides, on the other hand, offer a unique vantage point and are an awesome choice if you have limited time.
You get to see the glaciers and the snow-capped peaks from a birds-eye view with no obstructions!
Bear Glacier is a popular glacier to fly by in Kenai Fjords National Park since it’s the largest glacier off of the Harding Icefield!
I highly recommend a helicopter tour like this one while you’re in Alaska. You’ll get to see Bear Glacier and so much more!
Where to Stay

If possible, you should plan to stay in or around Seward.
The town is right outside the park, so it’s a short drive away.
Seward is packed with all types of accommodations – we stayed at Resurrection Lodge on the Bay and loved it! (You can see the view from the main area of the lodge in the photo above.)
You’ll also find several RV parks and campgrounds in Seward.
Alternatively, you can opt for an Airbnb as well!
How Long to Stay

If time is a factor, set aside at least two days to explore the massive Kenai Fjords National Park, Resurrection Bay (pictured above), and Seward. I’d do one day for the Harding Icefield hike, and one day for a boat tour and to explore Seward a bit.
Otherwise, four days would be perfect. Your days will be packed to the brim with mesmerizing mountain views, incredible glaciers, varied trails, and lots of wildlife.
Check out the best things to do in Seward here!
In conclusion…

The Harding Icefield Trail should definitely be on your Alaska Itinerary!
Just a few hours away from Anchorage on one of the most scenic drives in Alaska, it deserves your visit!
Do you have any questions about this hike? Comment below!
And if you’re heading to Alaska, here are a few posts you might find helpful:
- The Ultimate Alaska Itinerary
- 34 Crucial Things to Know Before Visiting Alaska
- 50 Best Places to Visit in Alaska
- 36 Things to Do On the Kenai Peninsula
- 12 Best Weekend Getaways from Anchorage
- Guide to Seward: The 18 Best Things to Do in Seward
- 17 Beautiful Glaciers to Visit in Alaska
Safe travels!
Jasmine